max planck institut
informatik
informatik

<< back | next >>
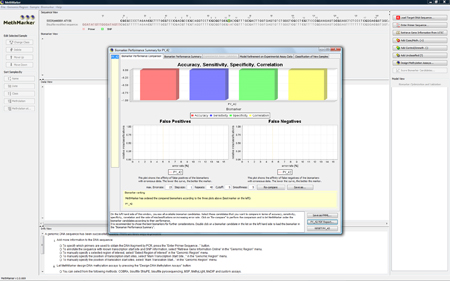
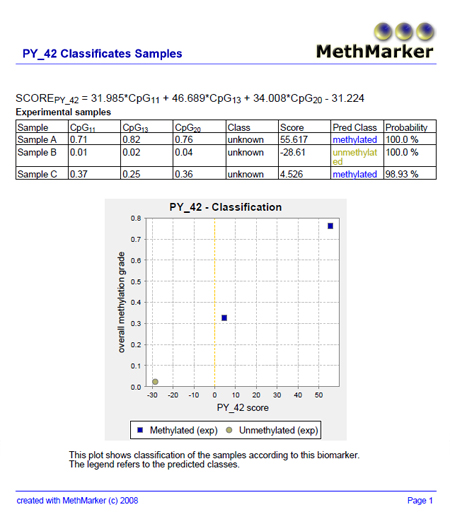
Classify SamplesMethMarker opens the biomarker summary window in which you can see the biomarkers found in the PMML models. In our case, it is just one biomarker candidate The regression formula of this biomarker candidate can be seen on the tab NOTE: Since there are no sample information in the PMML file, there is no training statistic and test statistic at this stage. |
|
|
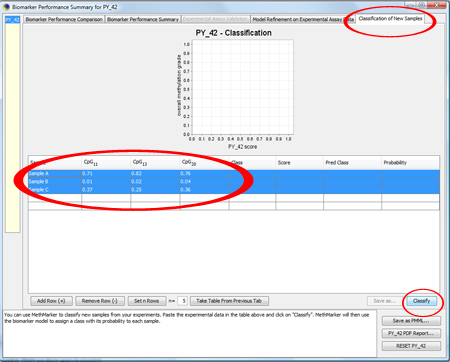
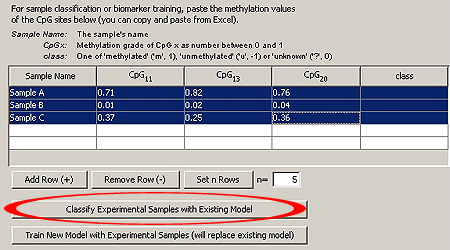
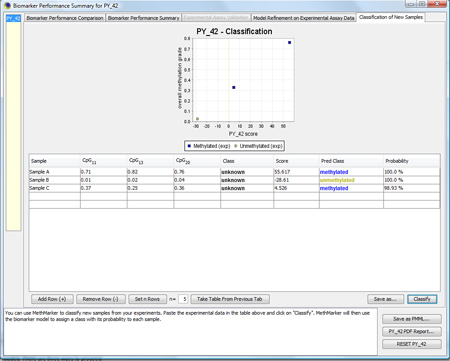
Now, go to the tab CpG methylation grades should be obtained by pyrosequencing, since After entering the data, click on "Classify". TIP: Copy and paste the sample information from Excel. NOTE: The column "class" is not important for this stage. You can leave it as it is, so that MethMarker will assign the class |
|
|
MethMarker will now classify the samples according to the logistic regression model and report the results. A classification plot shows the predicted classes of the samples. A classification table reports the samples, the original classes of the samples (as entered before), the biomarker scores, the predicted classes and the probability for the predicted classes. |
|
|
Save the classification result as PDF by click on "Save as...". |
|
<< back | next >> |